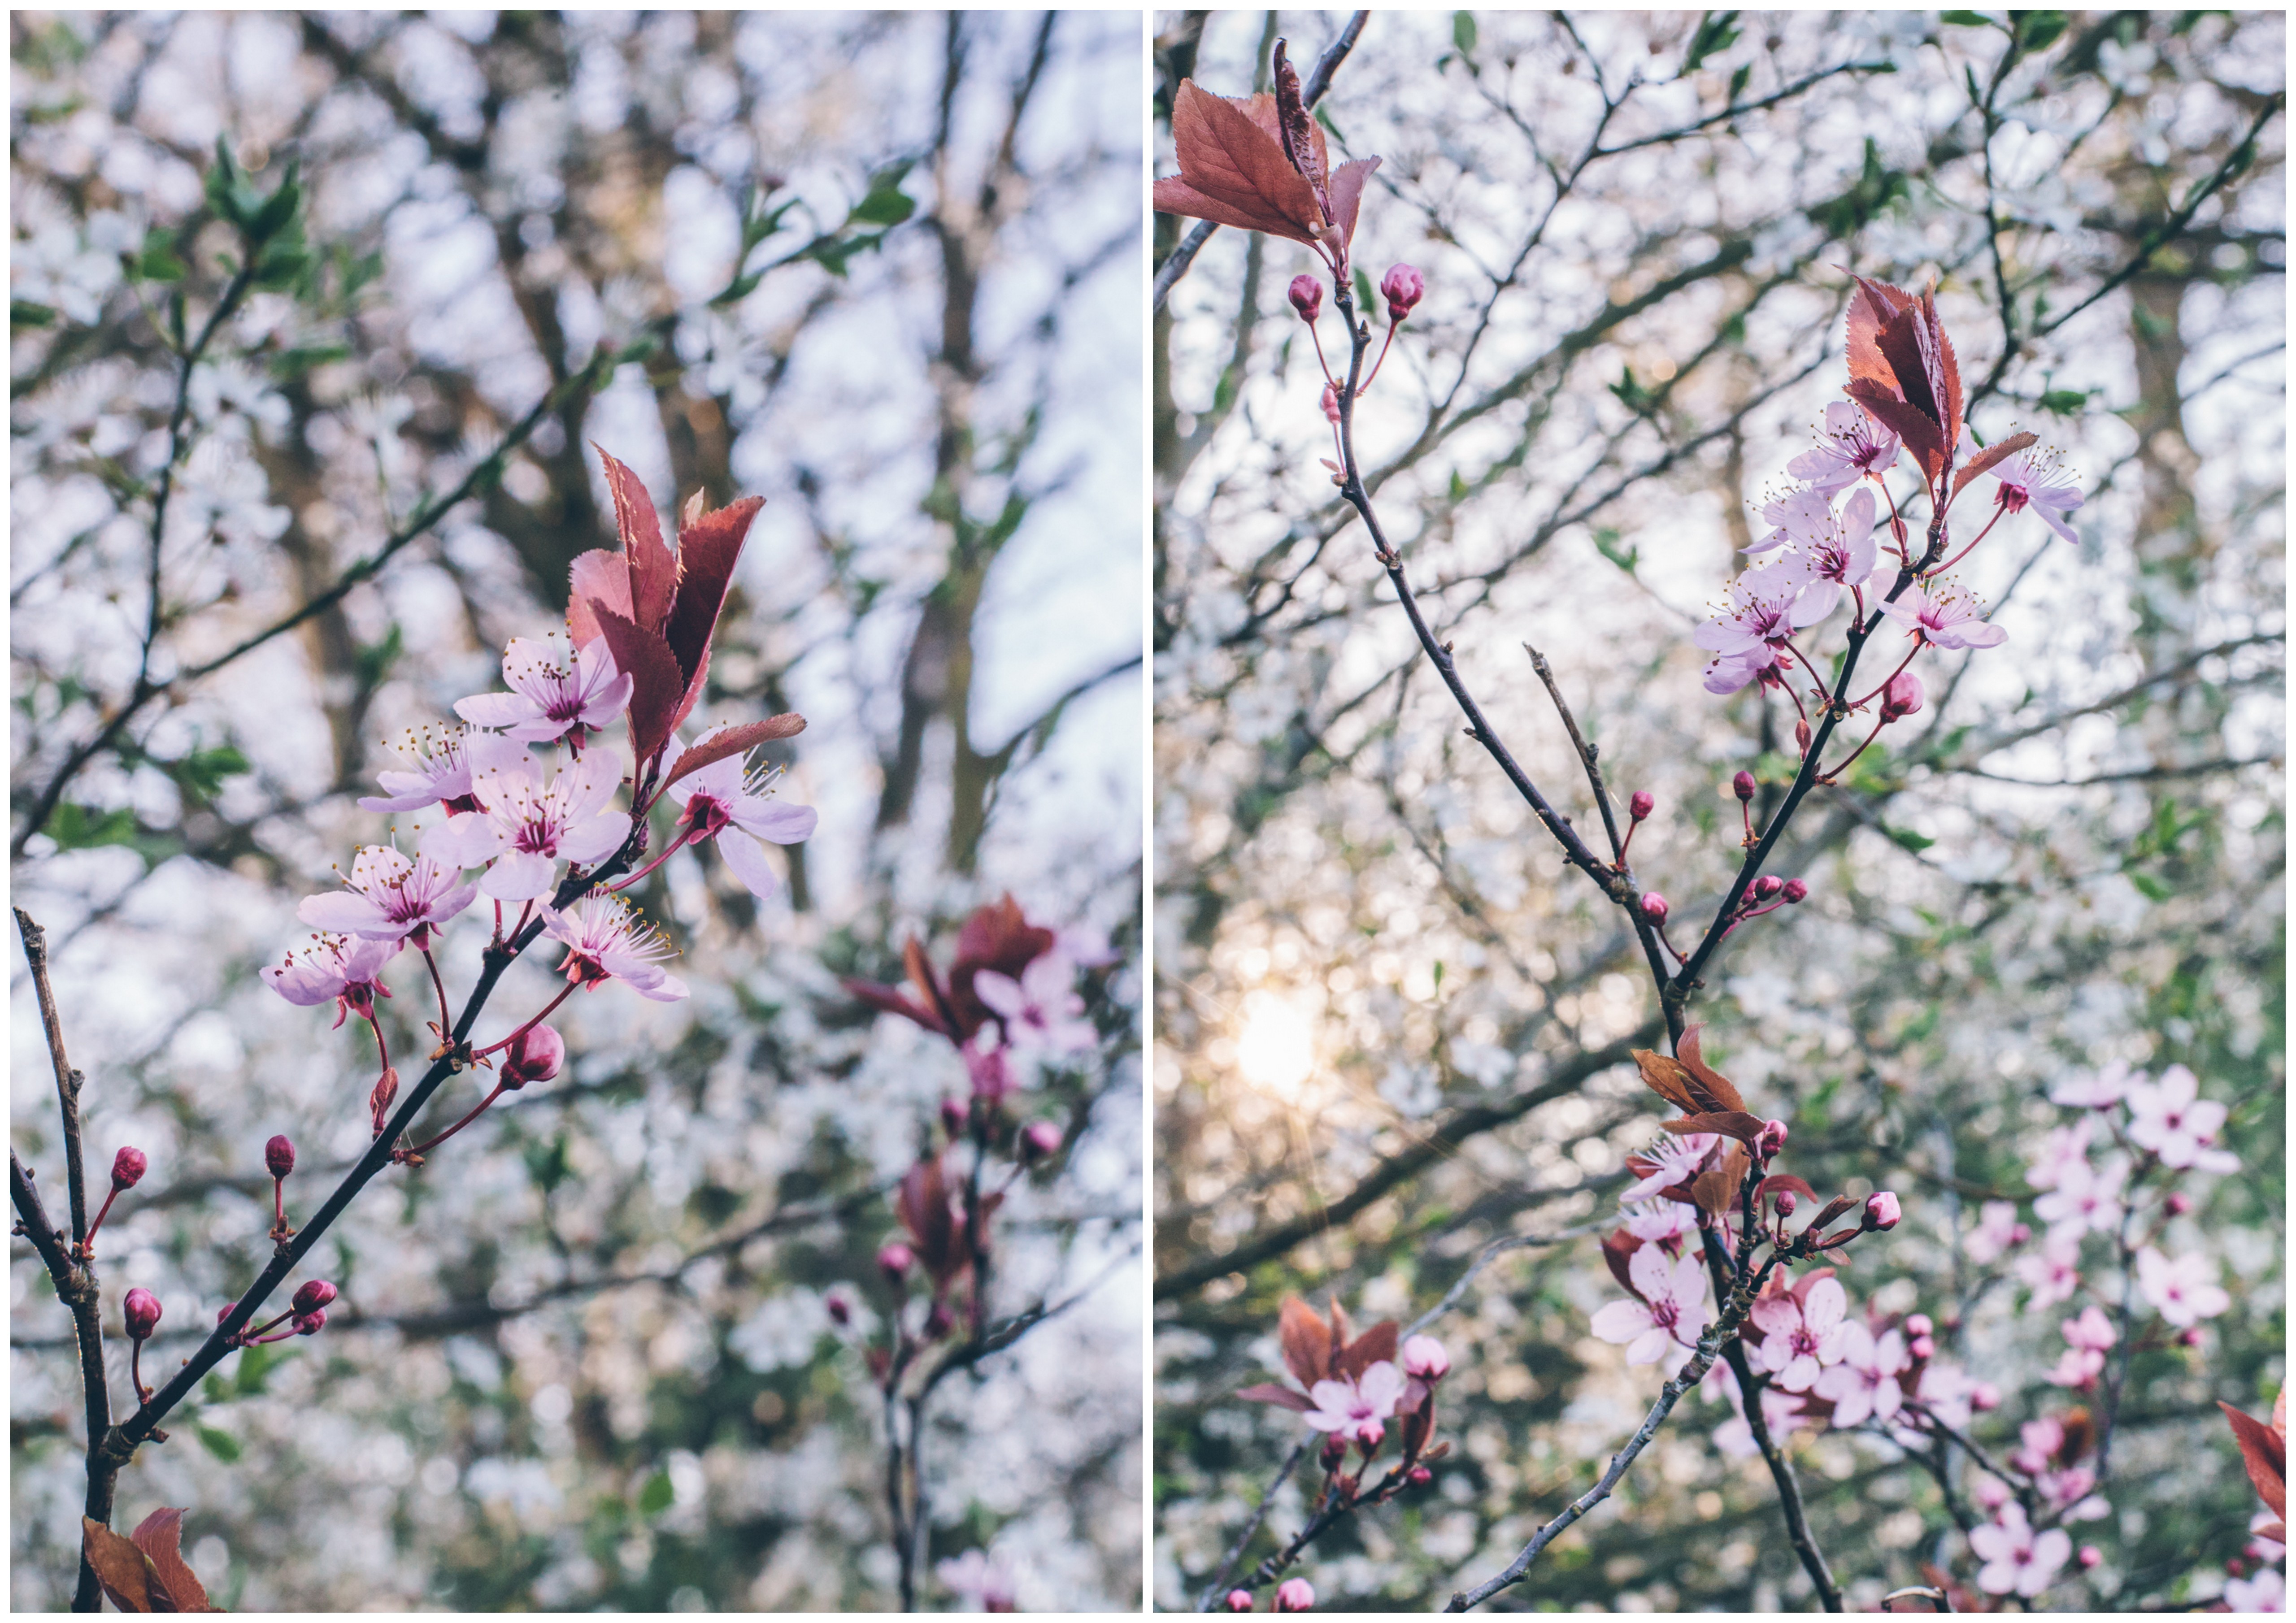
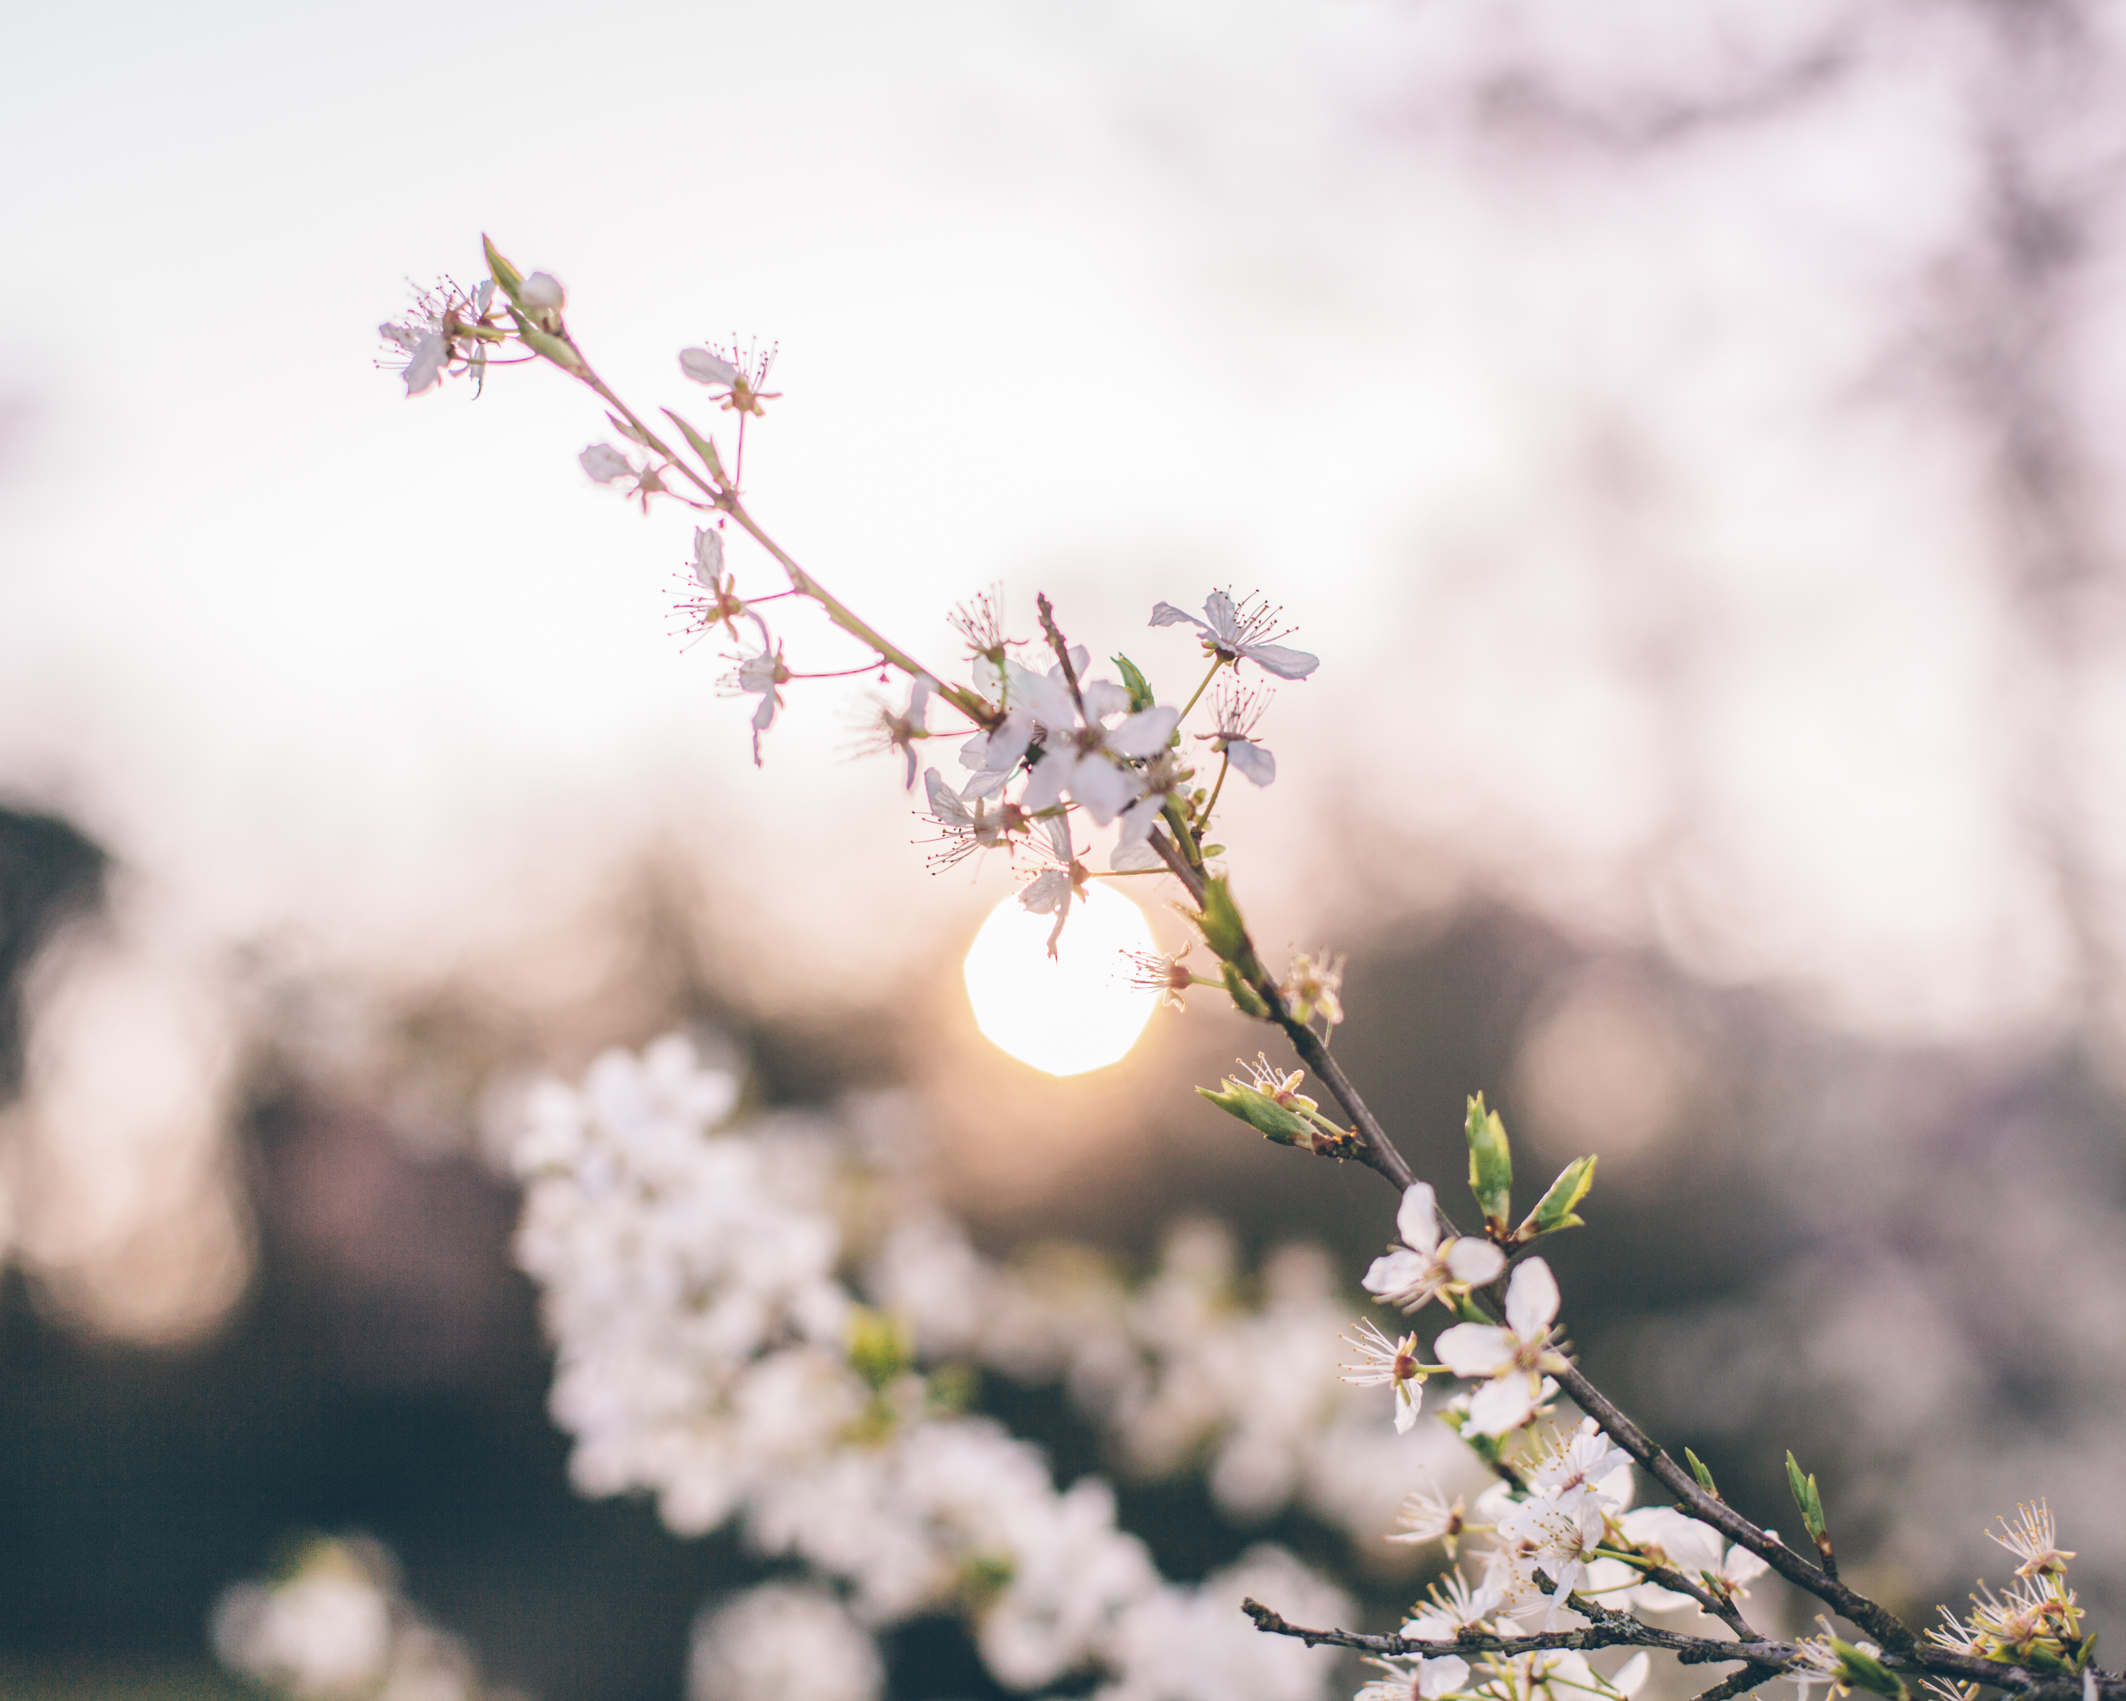
I love Spring time, one of the best things about this time of year is when nature starts blooming again after a cold winter. You know when Spring has arrived when the blossoms start appearing and bringing colour back to the naked branches. I have become slightly obsessed with blossoms this year and have been stopping to photograph them and pop a pic on Instagram. I took a trip to the Verulamium Park in St Albans the other weekend, and couldn’t stop myself from taking some photos when I found some pretty white and pink blossoms hanging around! Luckily, I had also bought along my prism, and I thought I would try out some effects with it! Let me know what you think of my photos and whether or not you think the prism makes the photos look more interesting 🙂 Would love to hear your thoughts!


Category Archives: Experimental
Floating Experiments
After a long an uneventful day work, I was suddenly feeling inspired. I had been reading the yowayowa camera woman diary, a Japanese photographer’s blog where she takes a different levitating photo every day. Now I love magic and levitation and I desperately wanted to try this out myself. I’d seen a few different ideas on how to take a levitation photo, and I’m pretty ok at Photoshop, so I thought I would give the ‘lie on a chair and edit it out’ technique a go! So here are my attempts…
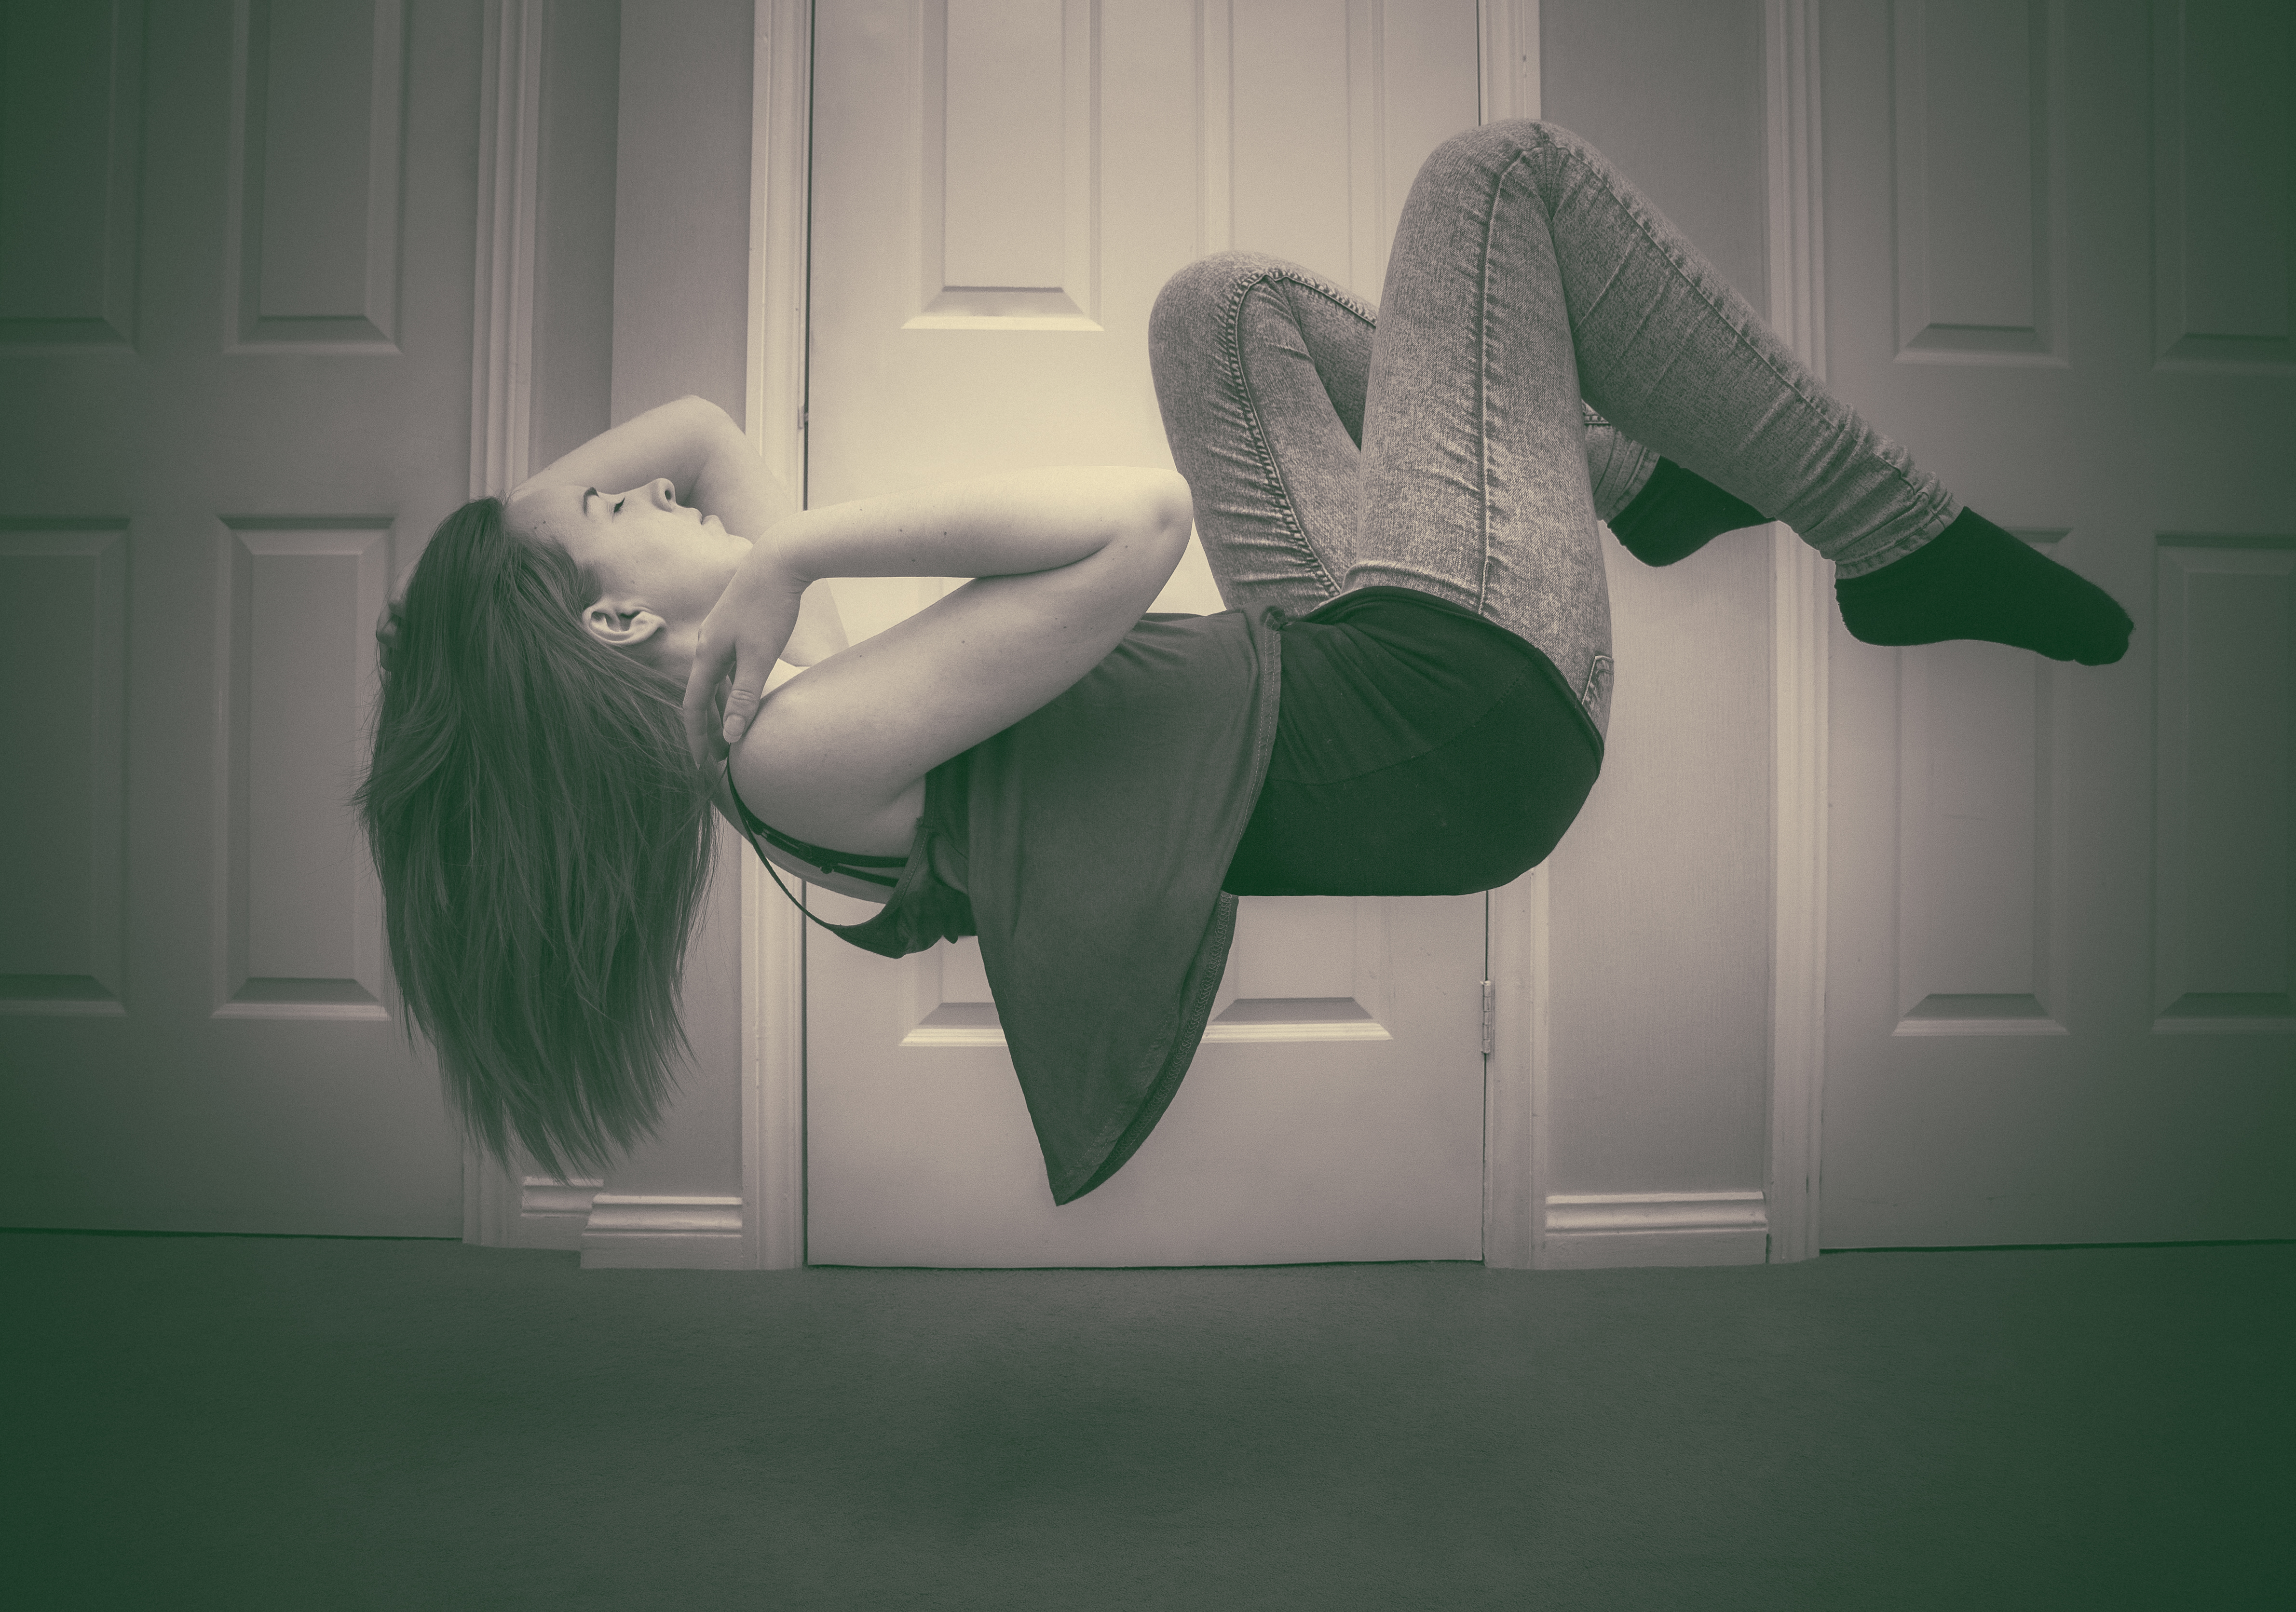
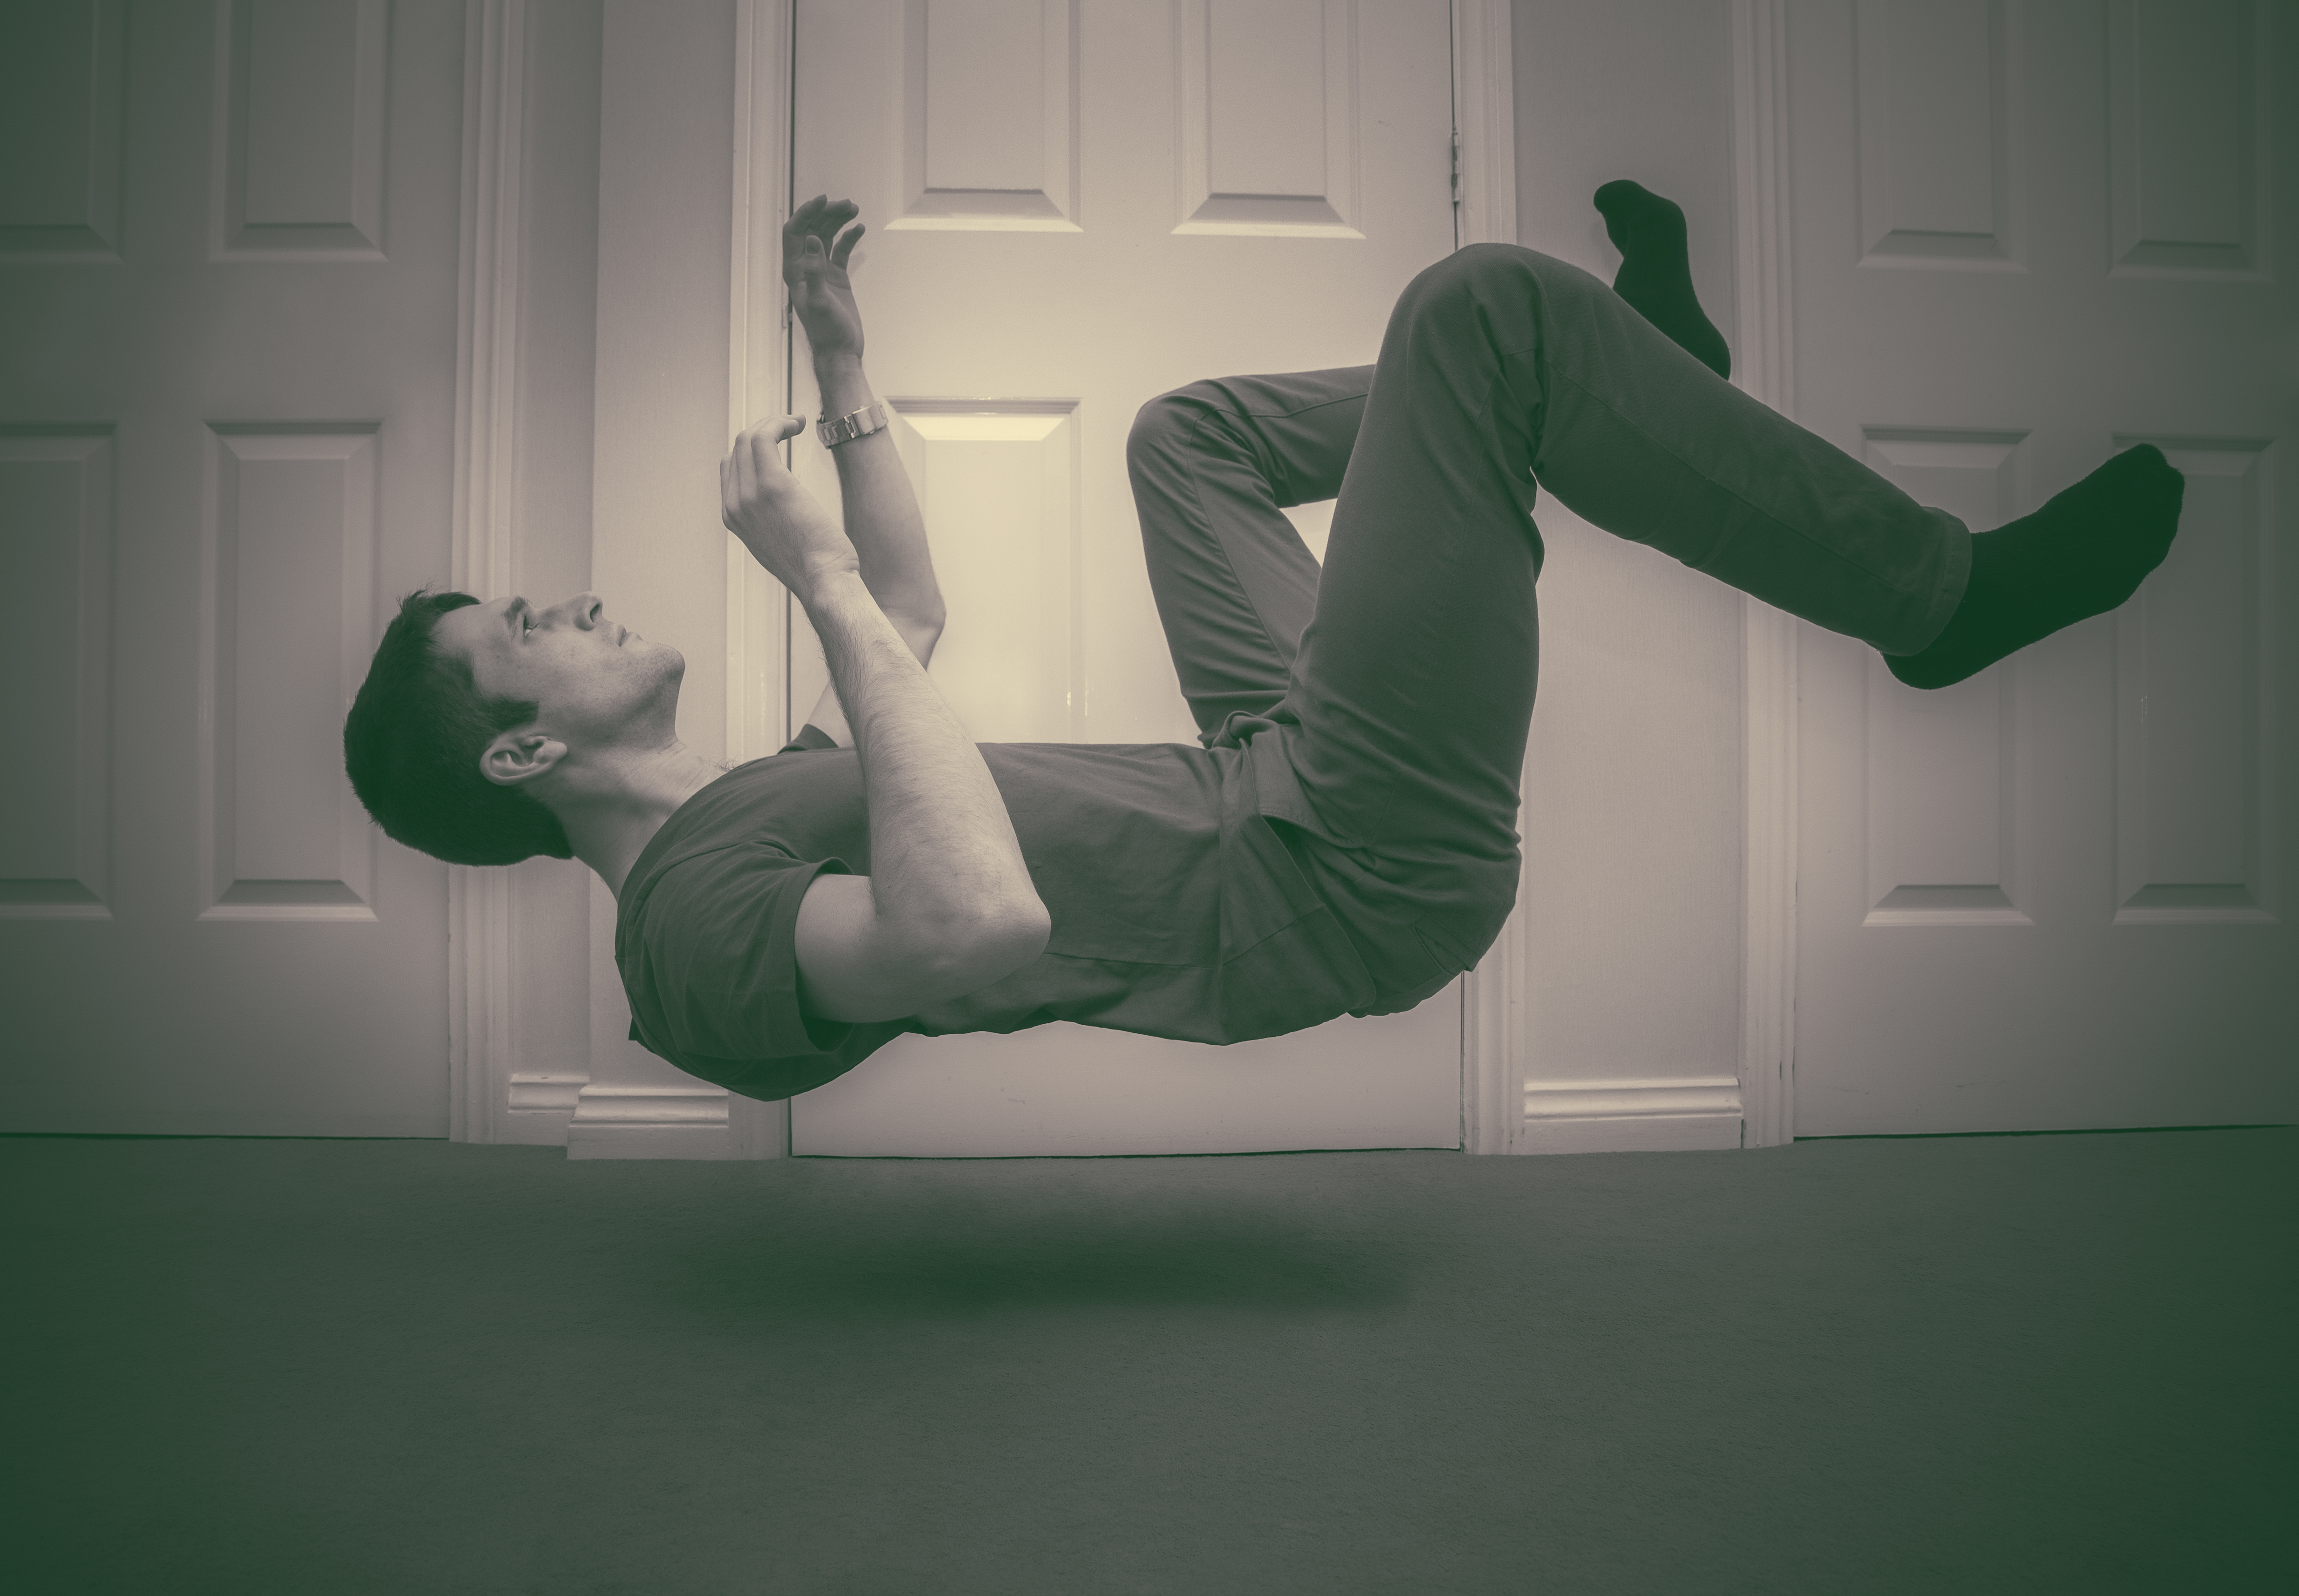
So I thought I would talk you through how I edited these! When editing an item out of a frame, it tends to help when you take a photo of the scene before anything is in it. So before we started I took a picture of the doors without the person or chair: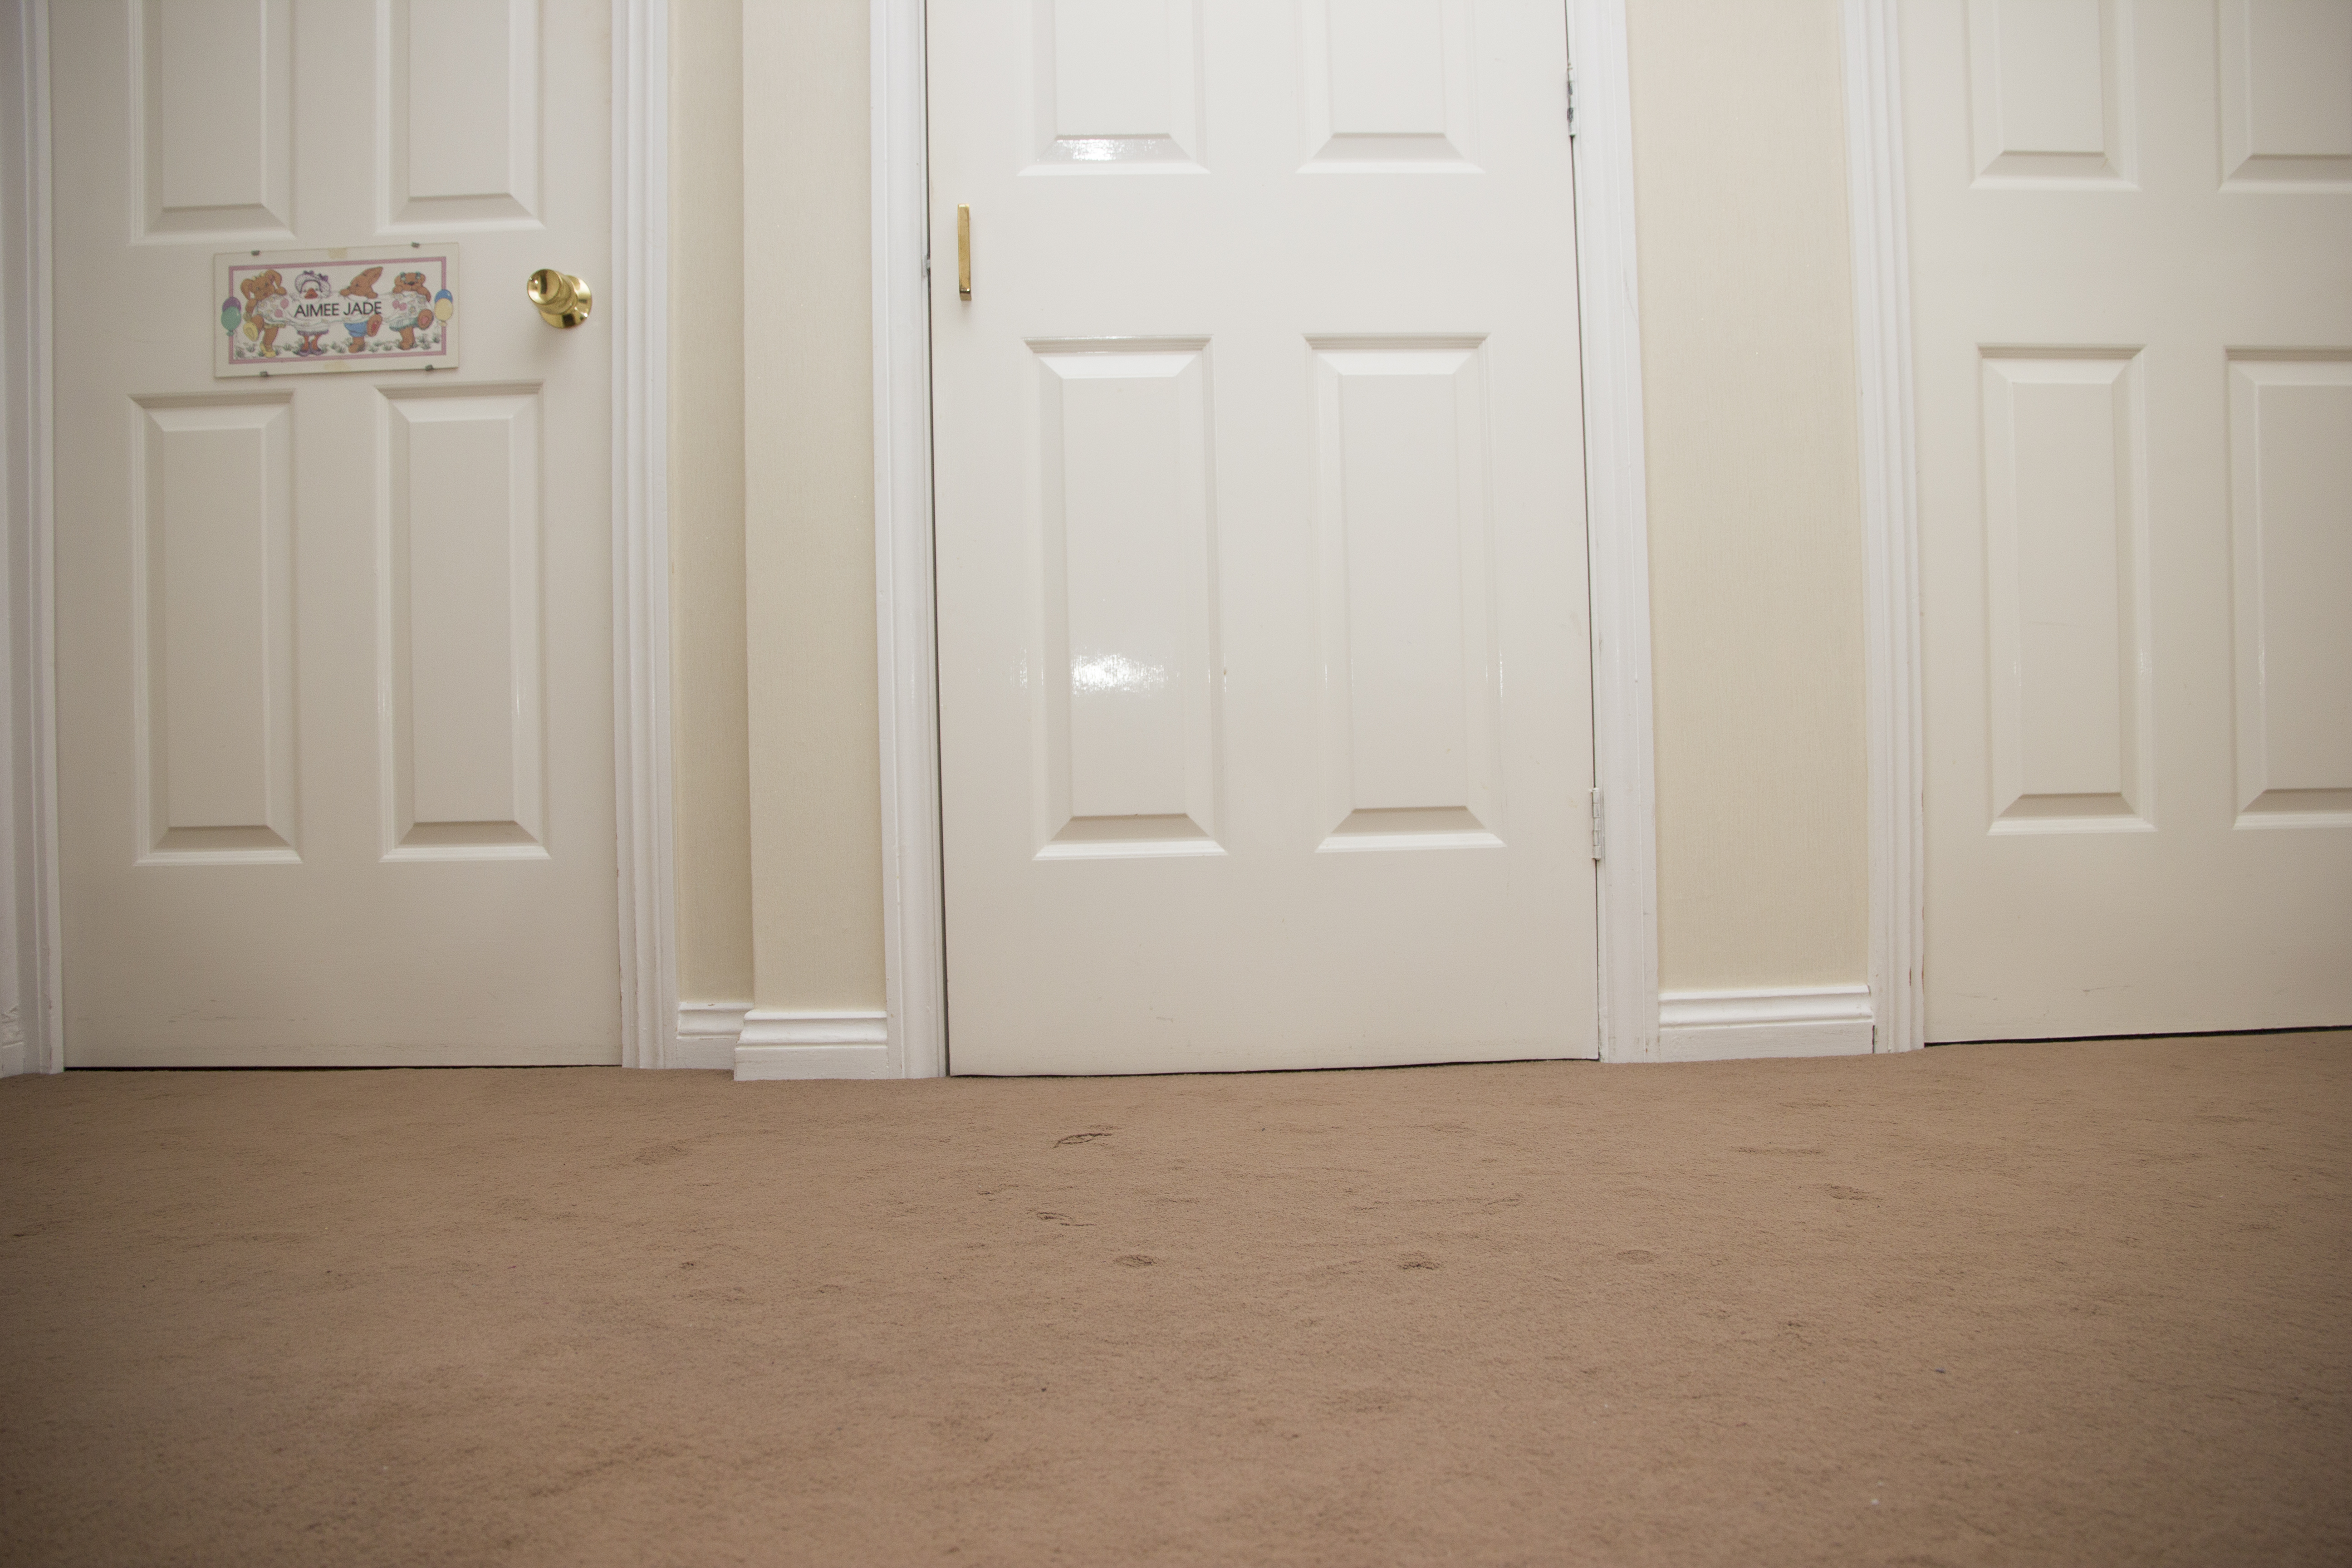
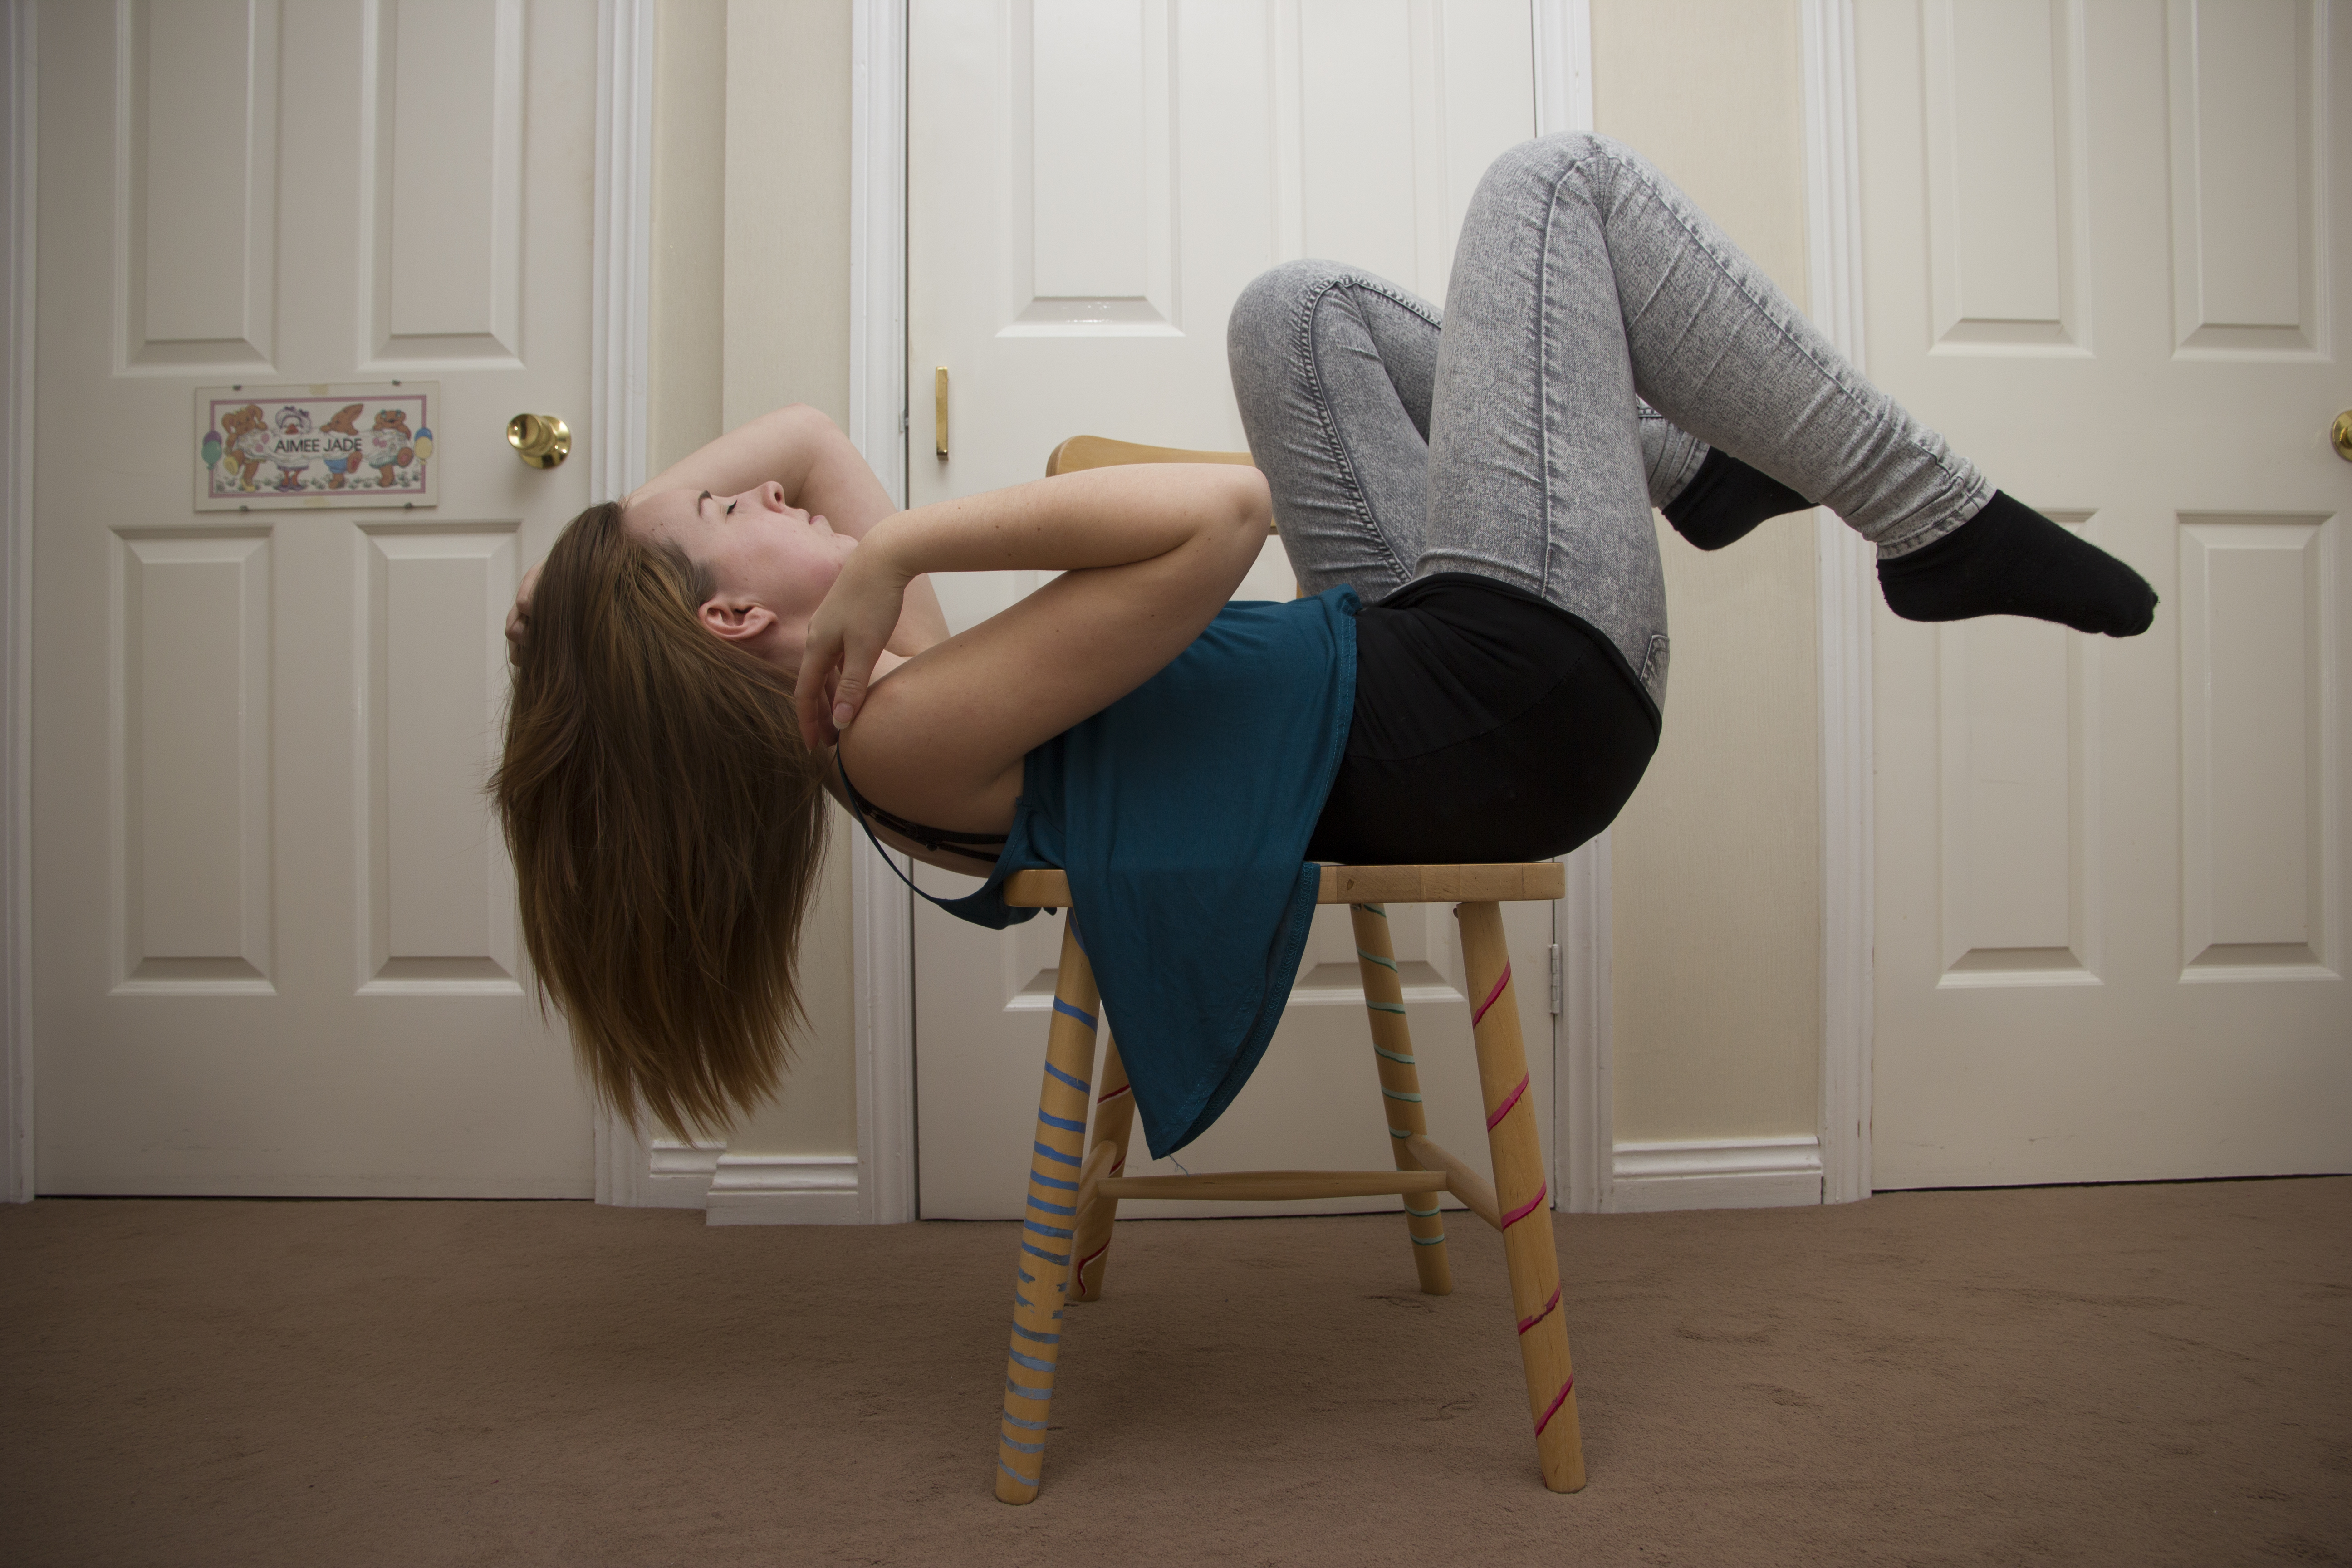 Then when it comes to post production, you can easily place the empty image over the one with the chair in, to erase it out.I then used the clone tool and the heal tool to blend one image into another to make sure that it doesn’t look placed on. It helps to use the clone tool first to get the edges sharp, then use the heal tool to blend in the harsh lines.
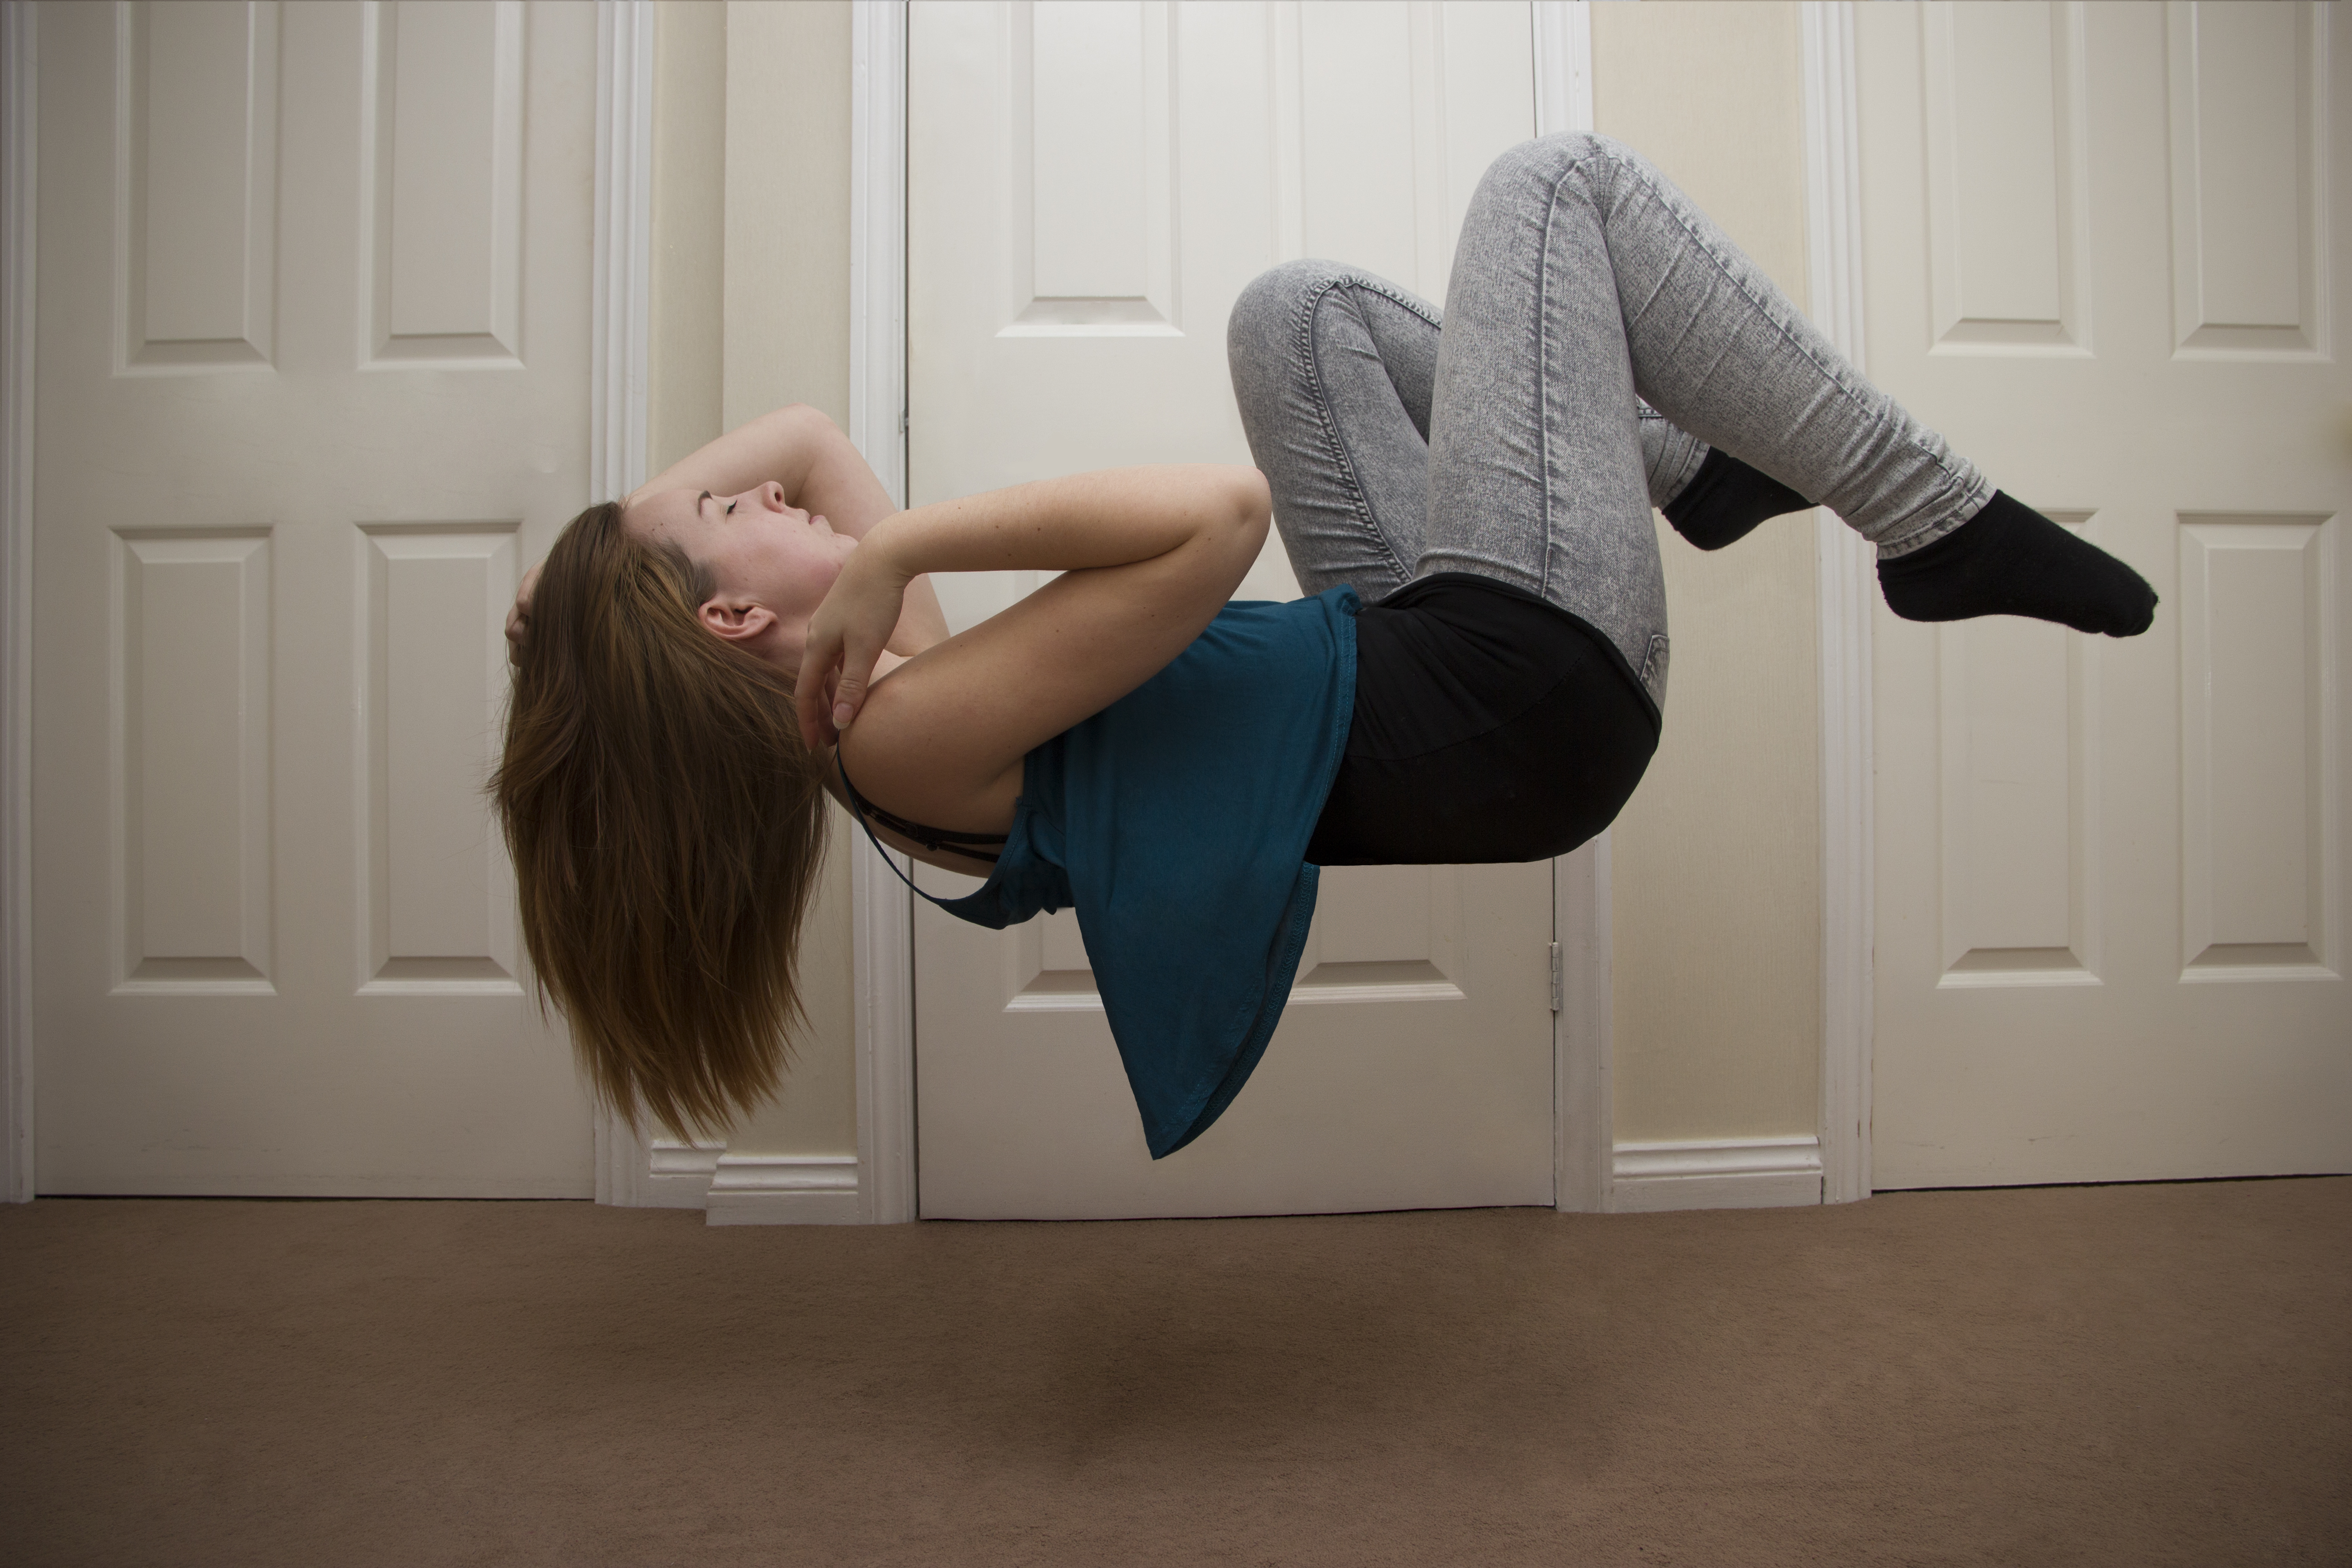 I decided to also tidy up the background by cloning out the sign and doorhandles, so that the focus isn’t taken away from the person. Once all the big changes are done, I then put the image into Lightroom to edit the colours and the general feel of the photo. I wanted them to have a eerie, ghostly feel, so first I decided to convert my image to black and white, then play with the curves. I move the bottom left of the curve up to blend the blacks with the greys and give the image a more grungy feel. Then I add a split tone of blue/yellow to the image ti give it some subtle colour and add to the overall feel. I then finish off with a subtle feathered vignette around the edges, to help draw the eye in and highlight the figure.
 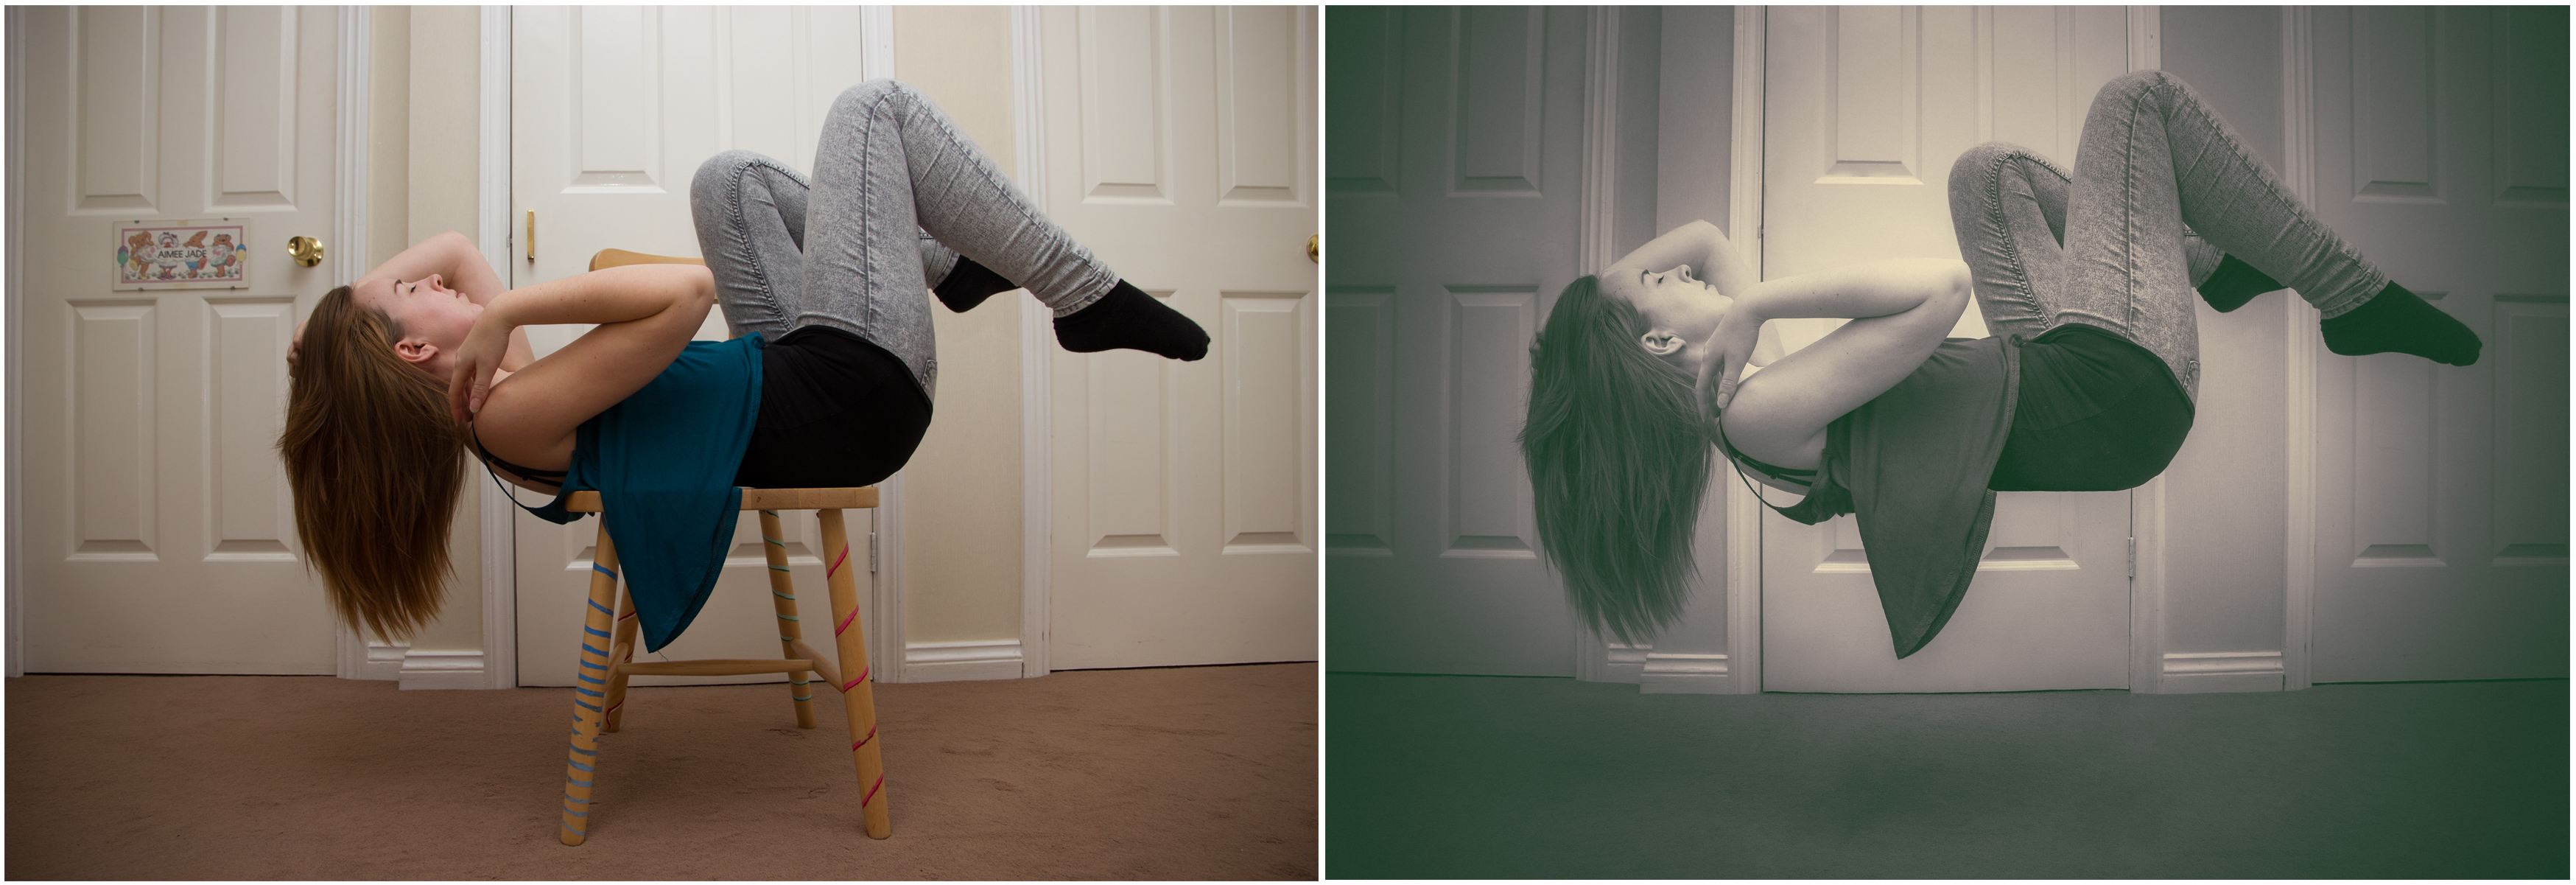 So here is the before and after next to each other. I think I did a good job for my first levitation photos, but I feel there is a lot to still improve on. For instance a better outfit choice would have been good! If my top didn’t hang down it may have improved the look of the image, as you can still kind of see the lip of the chair through my top! A better pose would have been great, and a better location. But as a first attempt, I’m pretty pleased 🙂
Have you ever thought about attempting a levitation photo? Let me know what you think!
